Installing ThingsBoard PE from Azure Marketplace
This guide describes how to install ThingsBoard Professional Edition from Azure Marketplace. Using this guide you will install BYOL version of the product. Basically, you get the license directly from ThingsBoard, Inc, but purchase corresponding server instances and infrastructure from Azure.
- Prerequisites
- Step 1. Subscribe to ThingsBoard PE BYOL
- Step 2. General configuration
- Step 3. Review created resource
- Step 4. Obtain your license secret
- Step 5. Configure your license secret
- Step 6. Launch ThingsBoard service
- Step 7. Connect to Thingsboard UI
- Post-installation steps
- Next steps
Prerequisites
- Active Microsoft Azure account.
Step 1. Subscribe to ThingsBoard PE BYOL
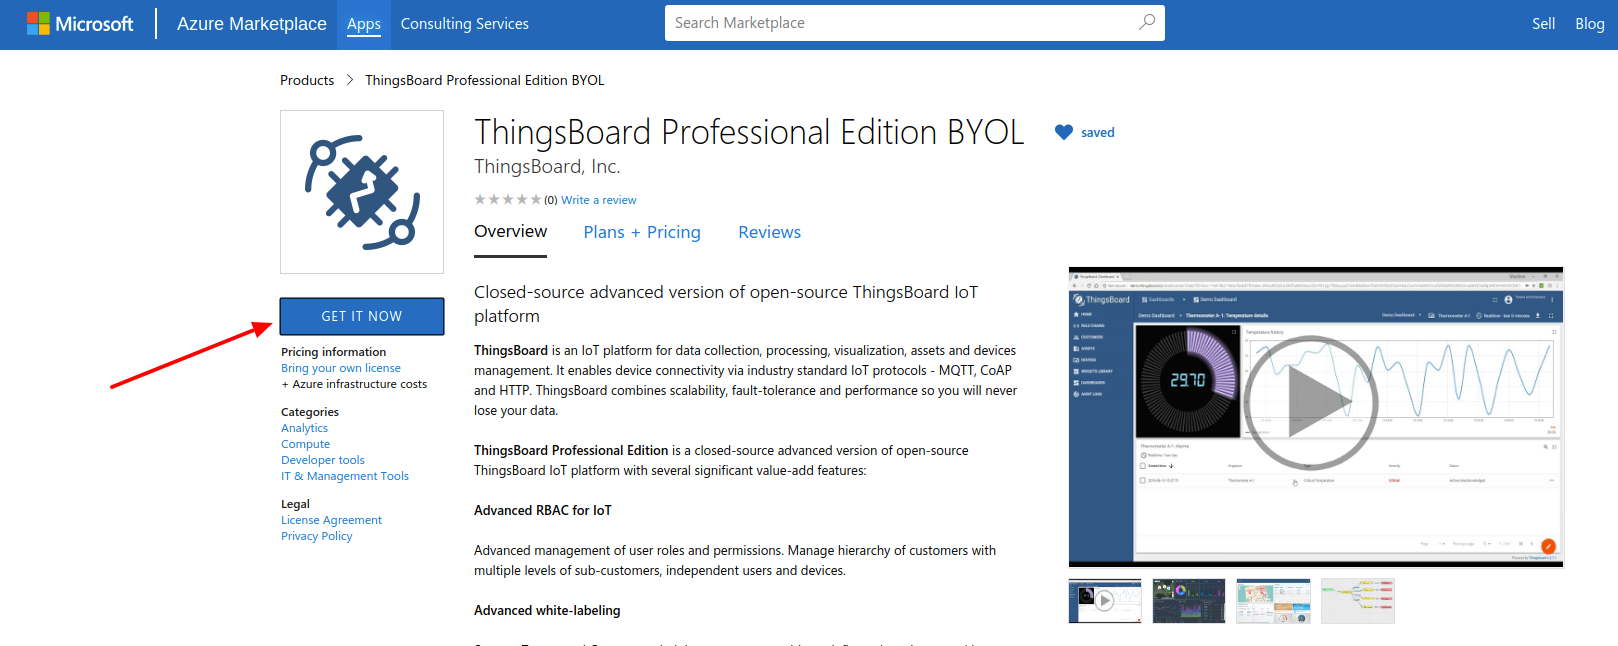
Open ThingsBoard Professional Edition BYOL product page from Azure Marketplace.
- Click the GET IT NOW button
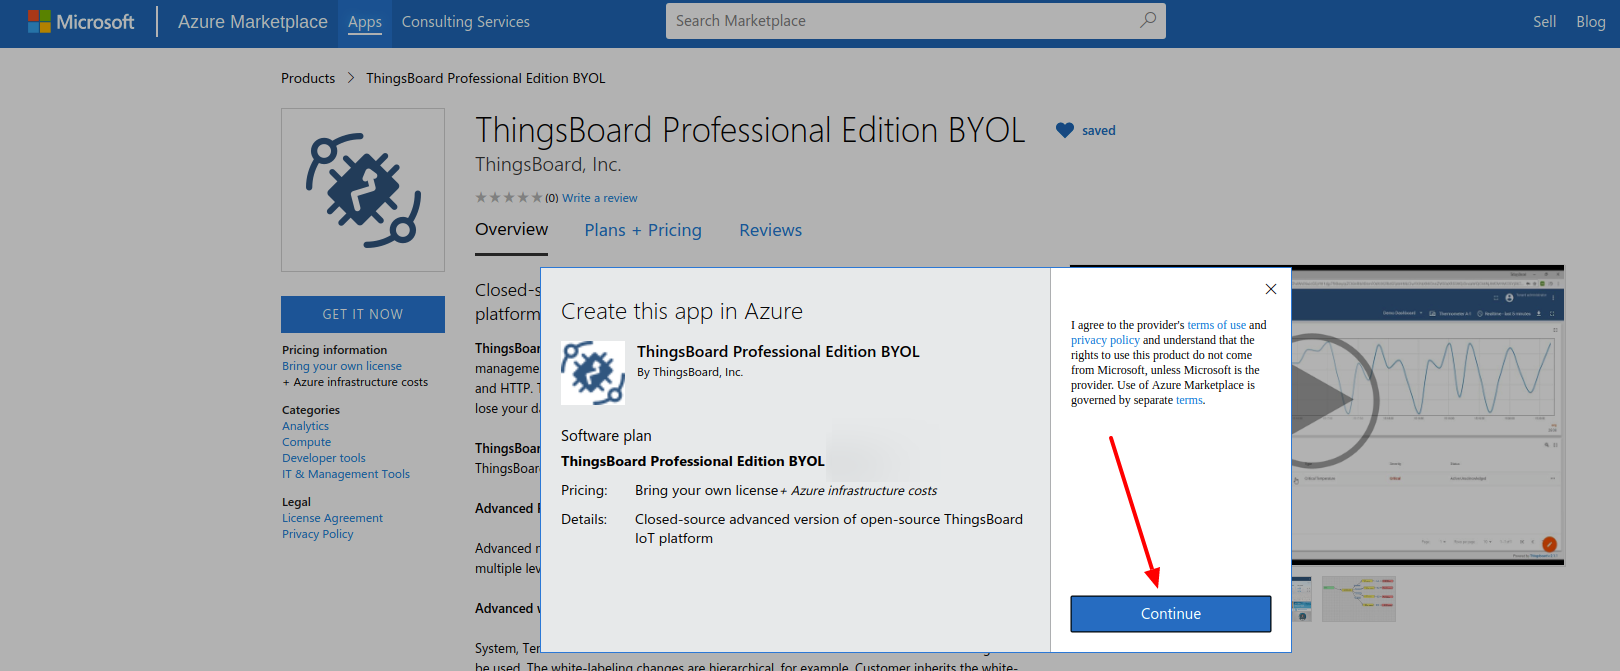
- Review and accept terms of use and privacy policy. Click the “Continue” button.
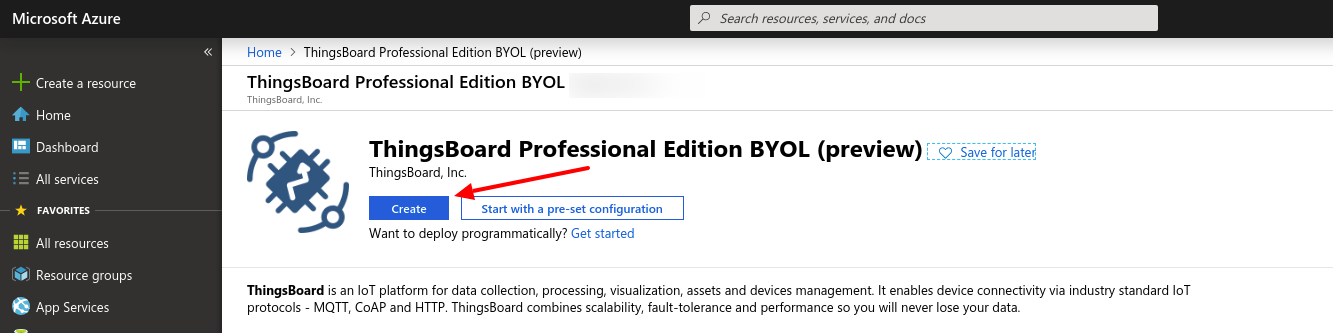
- You will be redirected to Azure Portal. Click the “Create” button to deploy your instance.
Step 2. General configuration
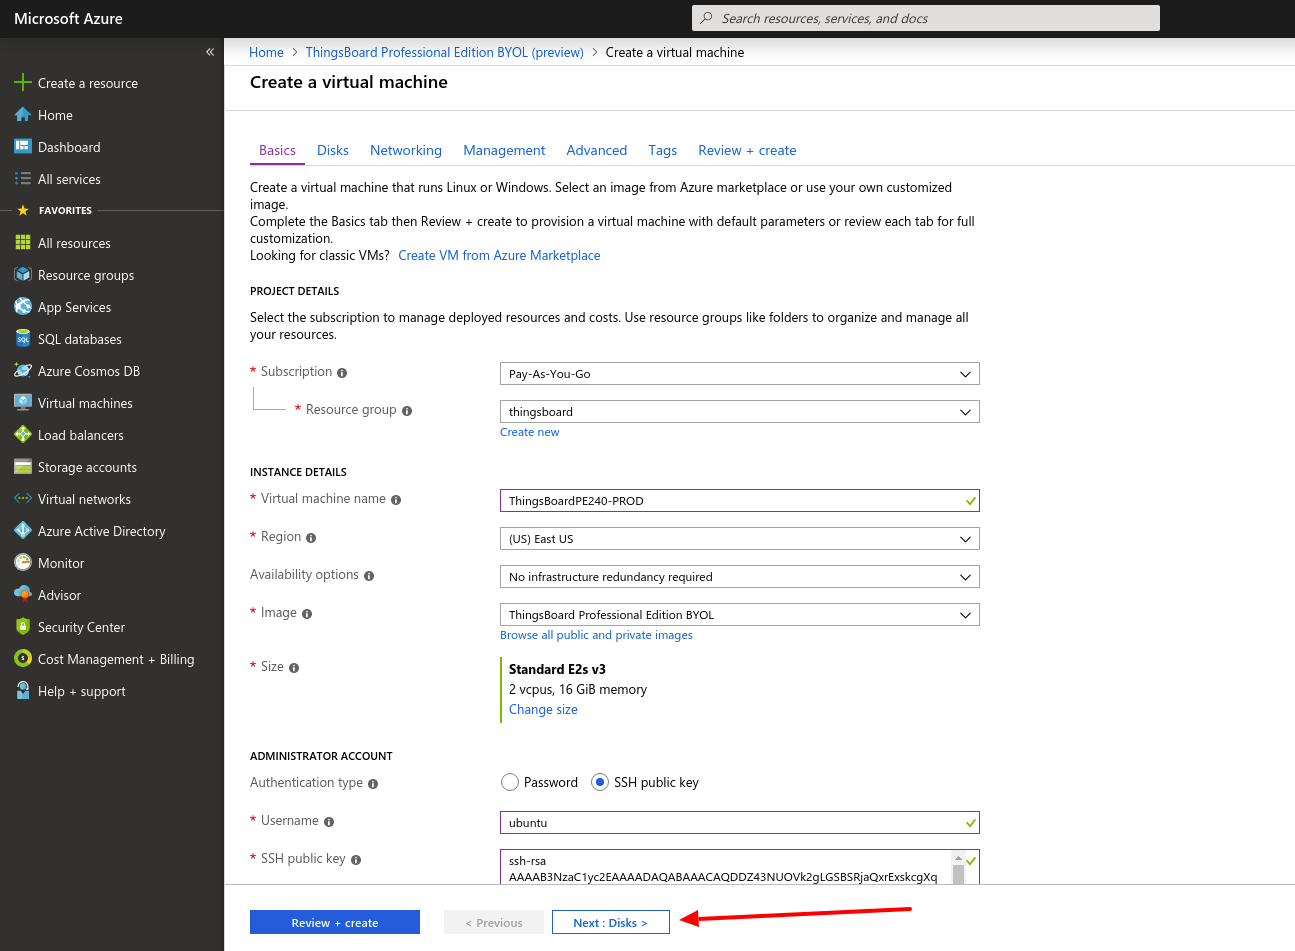
- You will be redirected to “Create a virtual machine” dialog with tons of setting. No worries, we are going to leave most of them with default values.
Step 2.1 Basics
- Create new “Resource group”, e.g. “thingsboard”;
- Add recognizable virtual machine name, e.g. “ThingsBoardPE-PROD”;
- Choose Region from available regions list;
- Configure “Administrator Account” to be “SSH public key”. Username must be ubuntu; See official Azure Docs on how to generate the keys.
- Click the “Next: Disks” button.
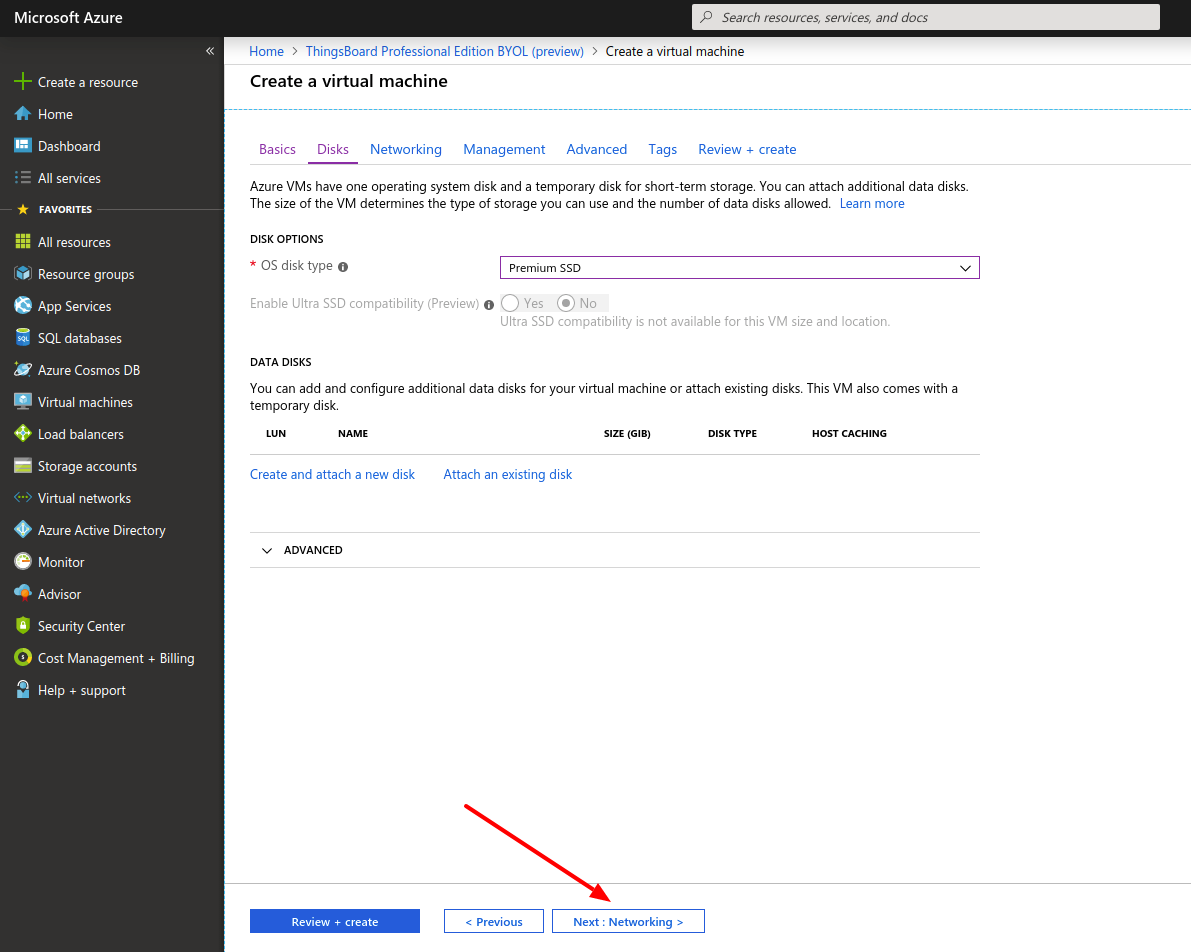
Step 2.2 Disks
- We suggest to leave this as-is, but you can optionally add new disks here;
- Click the “Next: Networking” button.
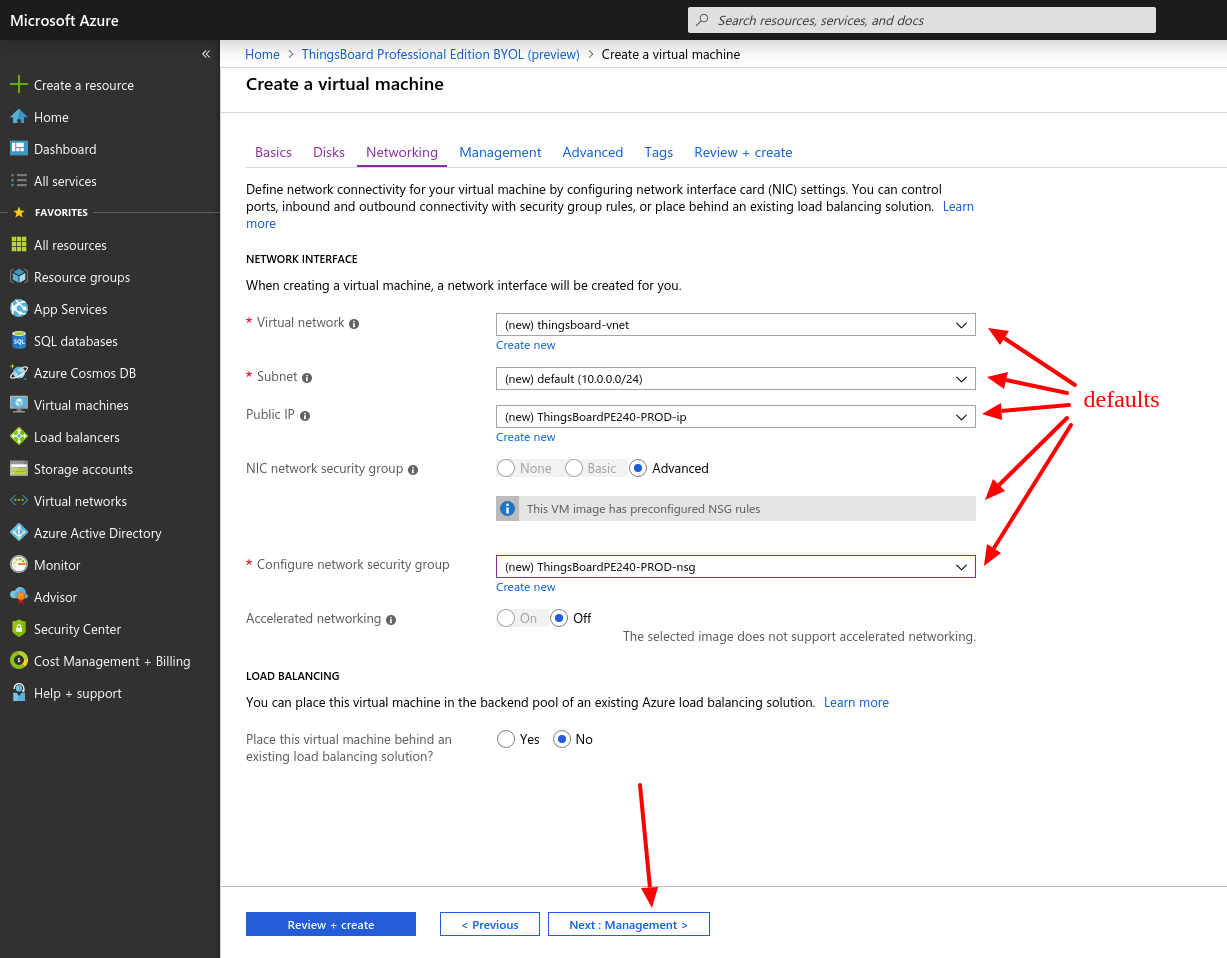
Step 2.3 Networking
- Leave all settings as-is;
- Make sure This VM uses preconfigured network security group;
- Click the “Next: Management” button.
Step 2.3 Management, Advanced, Tags
- Leave all settings as-is on all three tabs;
- Click the “Next” button until you reach “Review + create” tab.
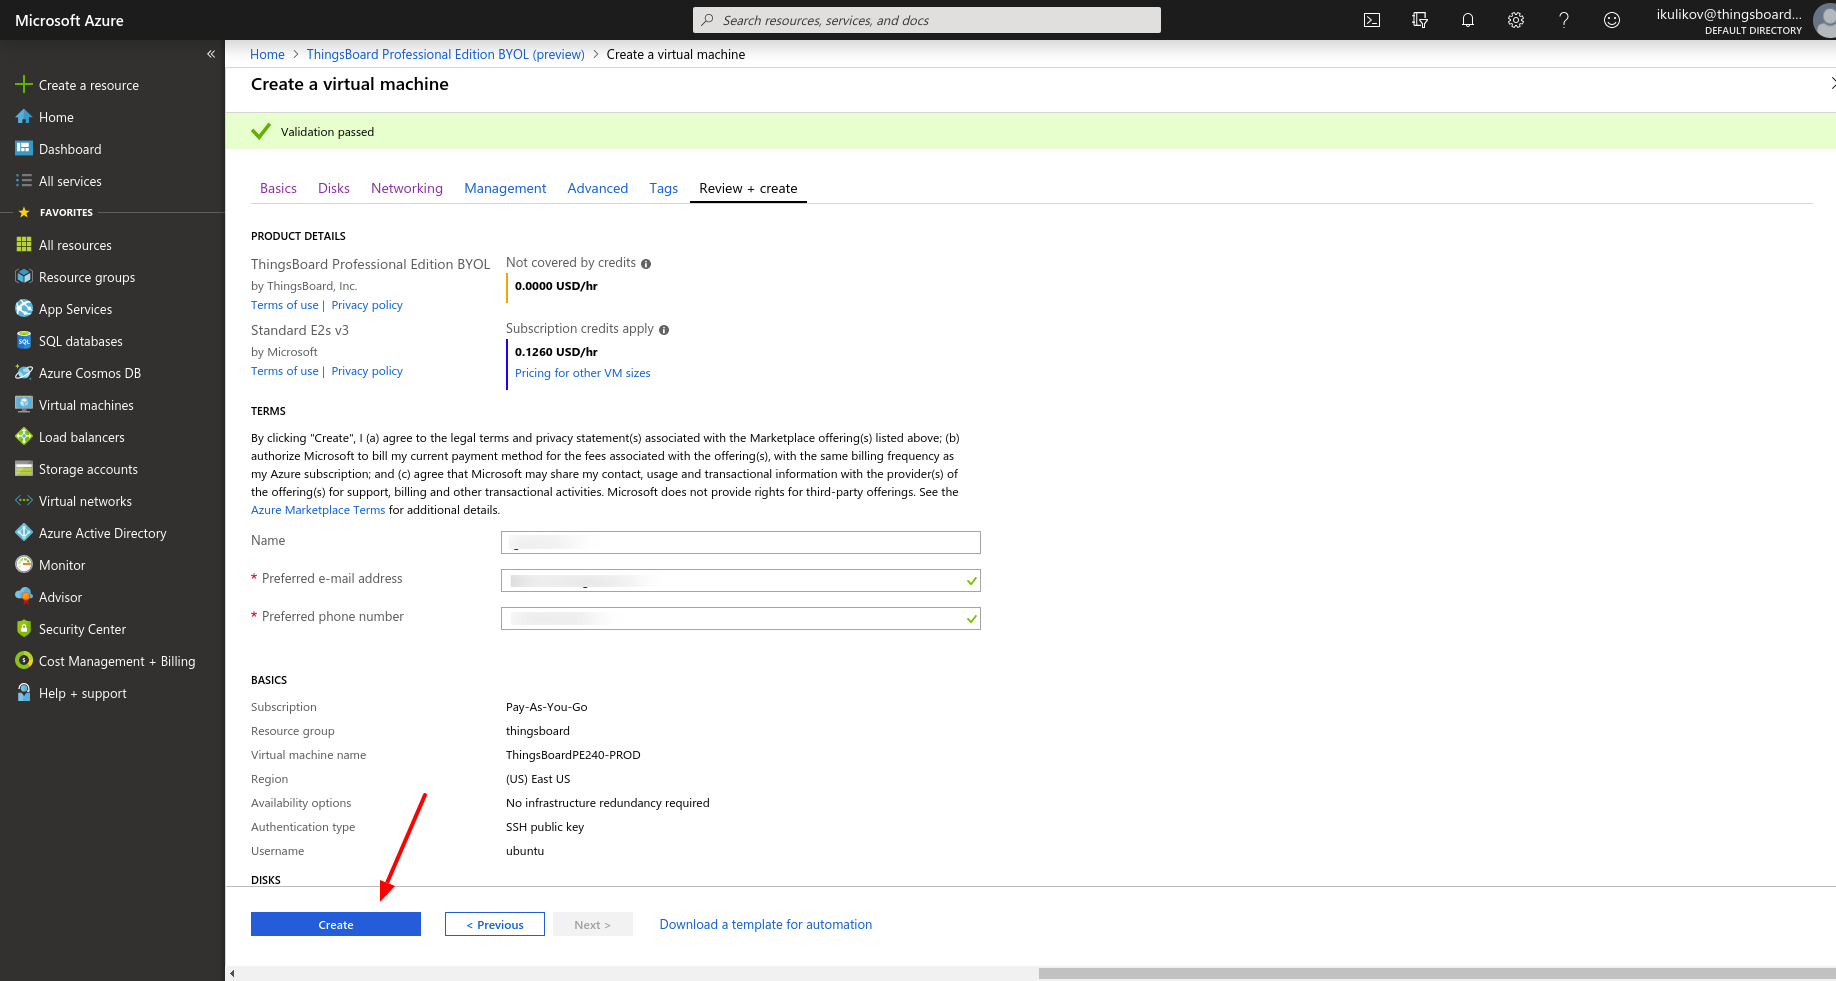
Step 2.4 Review + create
- Review the final product details;
- Make sure your name, email address and phone number is correct;
- Click the “Create” button to start the deployment.
- Once deployment is started it may take up to 30 minutes (but usually less then 5 minutes) to complete;
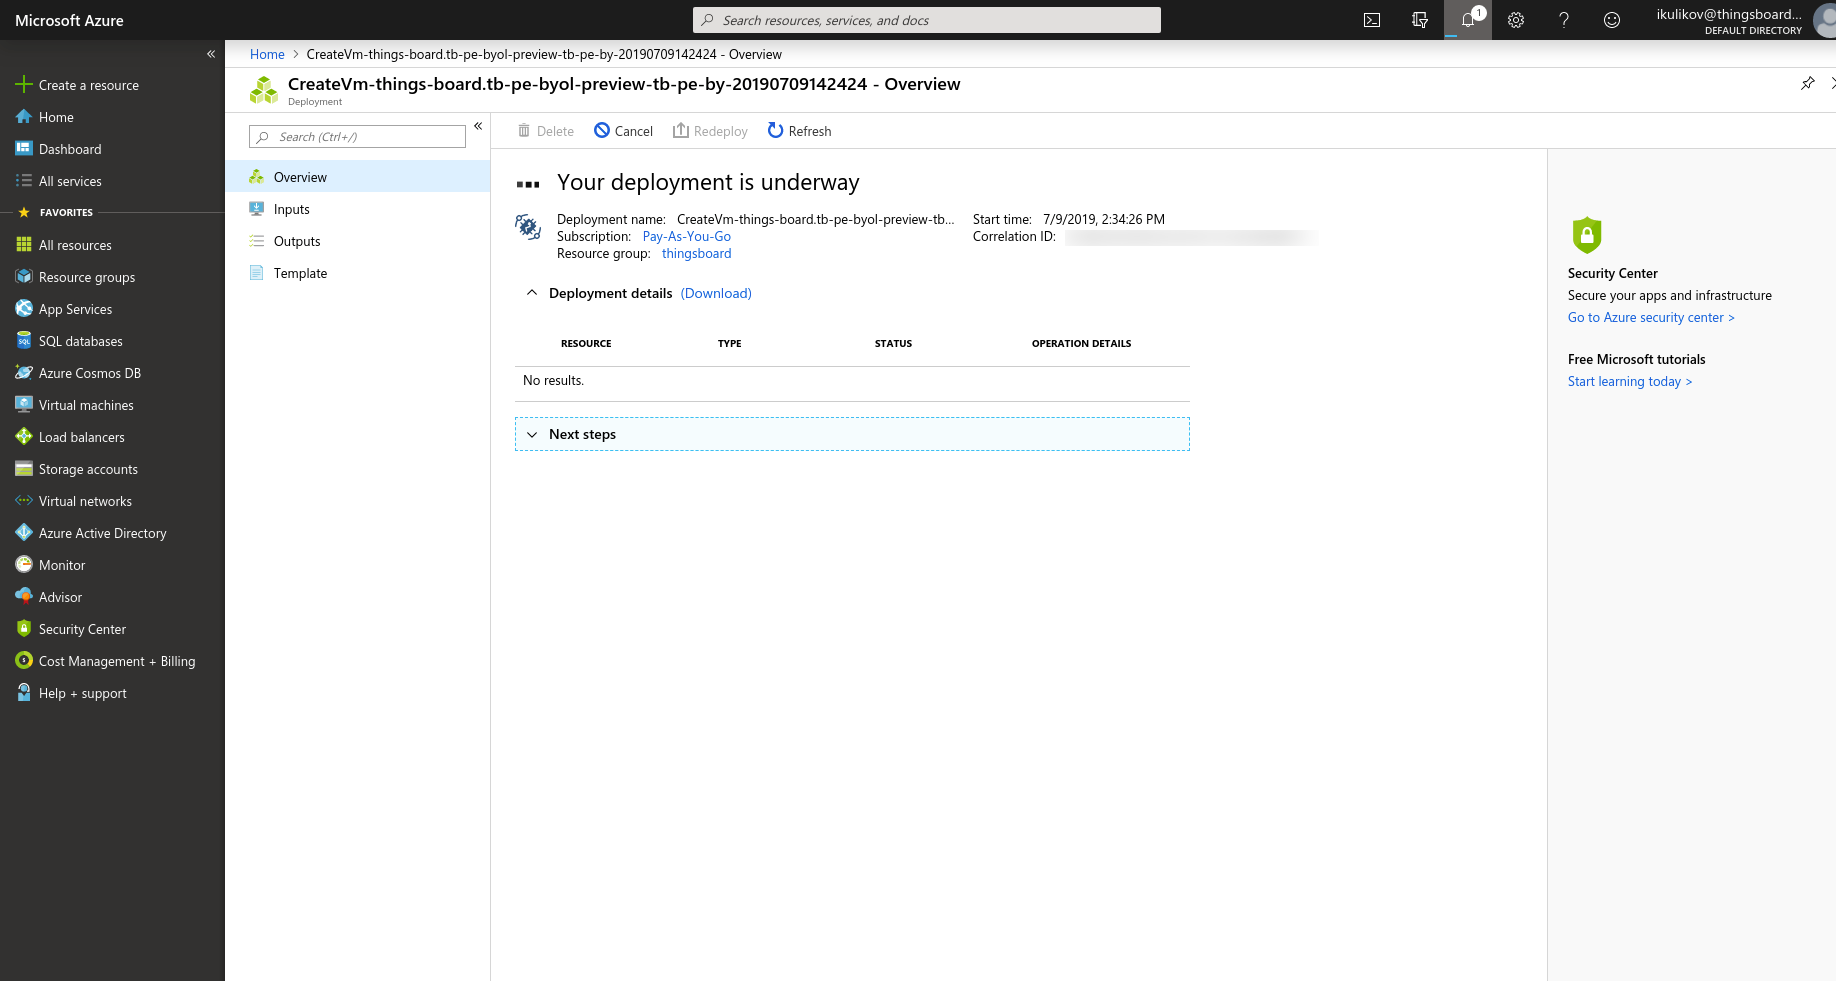
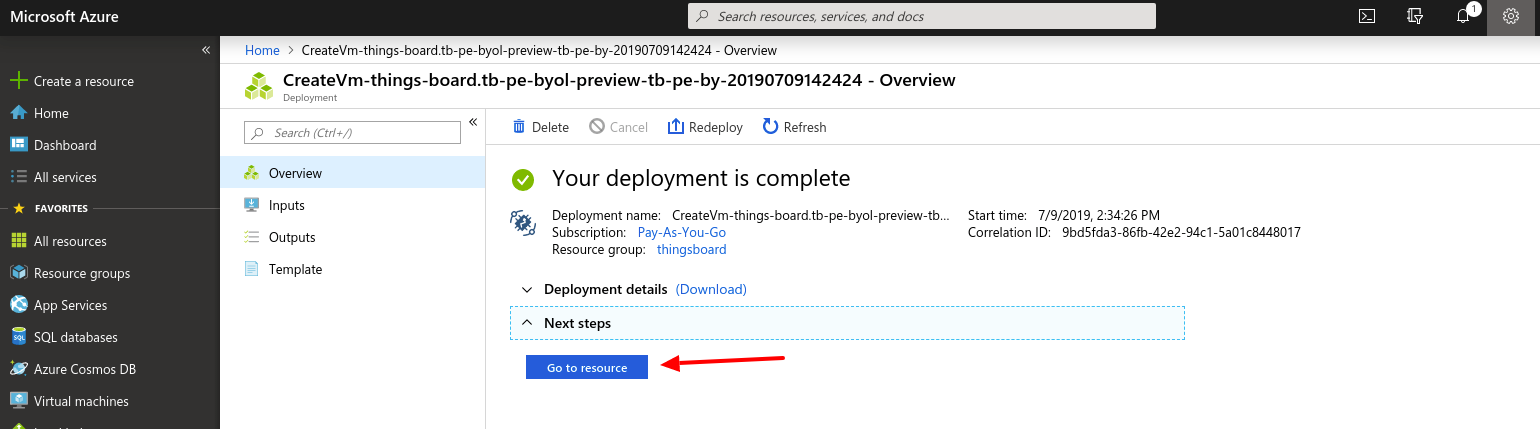
- Once your deployment is complete, click the “Go to resource” button.
Step 3. Review created resource
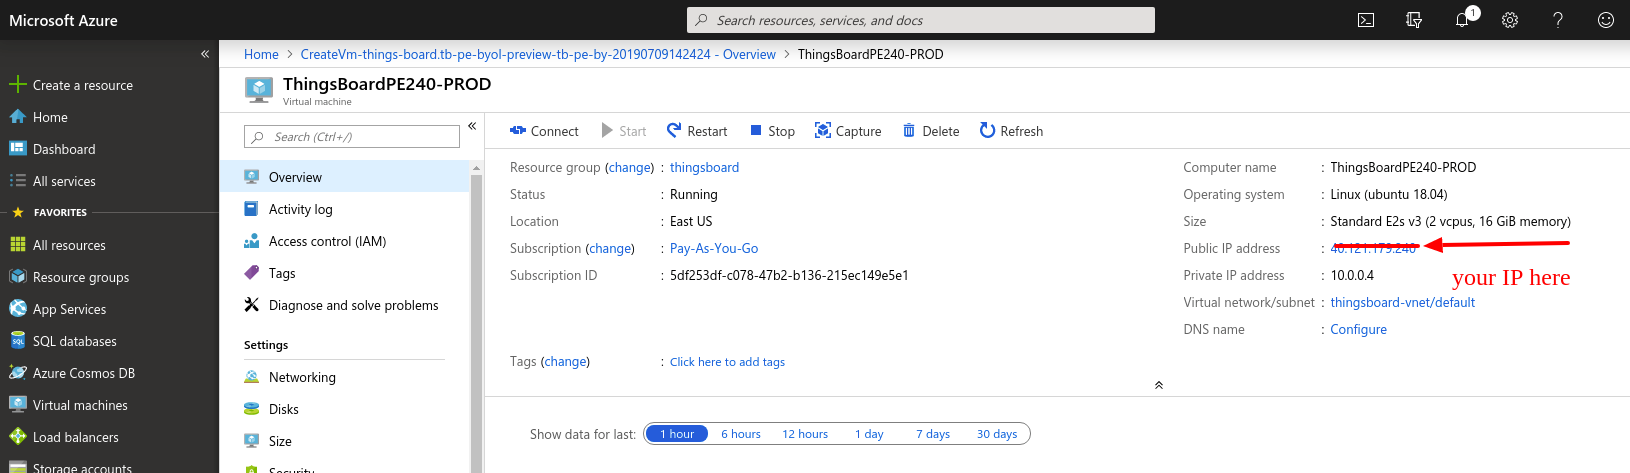
You will be navigated to the resource overview page. We should use this page to copy the external IP address of your instance. Please copy this IP address to a safe place. We will use it in our next steps.
As an example, on the image below, the IP address is highlighted and set to “40.121.179.240”
Step 4. Obtain your license secret
In order to activate your ThingsBoard instance you will need to get the license secret. ThingsBoard Licenses are managed by ThingsBoard License Portal.
Please register on ThingsBoard License Portal to get your license. See How-to get pay-as-you-go subscription or How-to get perpetual license for more details.
Please save your license secret to a safe place. We will use them later in this guide.
Step 5. Configure your license secret
Once you get the license secret, you should put it to the thingsboard configuration file.
Step 5.1. Connect to your Thingsboard Instance over SSH
Please use the official Azure guide on how to connect to Azure VM using SSH keys.
Note: You will need to use instance Public IP (see Step 3) and the key file (see Step 2.1)
Step 5.2. Put License Secret to thingsboard configuration file
Open the file for editing using the following command:
sudo nano /etc/thingsboard/conf/thingsboard.conf
Locate the following configuration block:
# License secret obtained from ThingsBoard License Portal (https://license.thingsboard.io)
# UNCOMMENT NEXT LINE AND PUT YOUR LICENSE SECRET:
# export TB_LICENSE_SECRET=
and put your license secret. Please don’t forget to uncomment the export statement. See example below:
# License secret obtained from ThingsBoard License Portal (https://license.thingsboard.io)
# UNCOMMENT NEXT LINE AND PUT YOUR LICENSE SECRET:
export TB_LICENSE_SECRET=YOUR_LICENSE_SECRET_HERE
Step 6. Launch ThingsBoard service
Execute the following command to start ThingsBoard:
sudo service thingsboard start
Step 7. Connect to Thingsboard UI
Now you can open this link in your browser:
- http://PUBLIC_IP_ADDRESS/login
In this example:
- http://40.121.179.240/login
Use this login to connect as system Administrator
- sysadmin@thingsboard.org
Default password for System Administrator is:
- sysadmin
Now you can proceed to the next steps.
Post-installation steps
Configure HAProxy to enable HTTPS
- Step 1. Assign valid domain name system (DNS) record to your instance external IP address.
- Step 2. Connect to your instance using SSH or PuTTY using instructions from the previous questions above.
- Step 3. Execute the following commands:
 sudo certbot-certonly --domain smth.yourcompany.com --email support@yourcompany.com
 sudo haproxy-refresh
where smth.yourcompany.com is your DNS name from the second step and support@yourcompany.com is your email to get notifications from certbot.
Next steps
-
Getting started guides - These guides provide quick overview of main ThingsBoard features. Designed to be completed in 15-30 minutes.
-
Connect your device - Learn how to connect devices based on your connectivity technology or solution.
-
Data visualization - These guides contain instructions how to configure complex ThingsBoard dashboards.
-
Data processing & actions - Learn how to use ThingsBoard Rule Engine.
-
IoT Data analytics - Learn how to use rule engine to perform basic analytics tasks.
-
Hardware samples - Learn how to connect various hardware platforms to ThingsBoard.
-
Advanced features - Learn about advanced ThingsBoard features.
-
Contribution and Development - Learn about contribution and development in ThingsBoard.