ThingsBoard Professional Edition cluster setup with Docker Compose guide
- Prerequisites
- Step 1. Checkout all ThingsBoard PE Images
- Step 2. Pull ThingsBoard PE Images
- Step 3. Clone ThingsBoard PE Docker Compose scripts
- Step 4. Obtain your license key
- Step 5. Configure your license key
- Step 6. Review the architecture page
- Step 7. Configure ThingsBoard database
- Step 8. Choose ThingsBoard queue service
- Step 9. Running
- Upgrading
- Next steps
This guide will help you to setup ThingsBoard in cluster mode with Docker Compose. For this purpose, we will use docker container images available on Docker Hub.
Prerequisites
ThingsBoard Microservices are running in dockerized environment. Before starting please make sure Docker CE and Docker Compose are installed in your system.
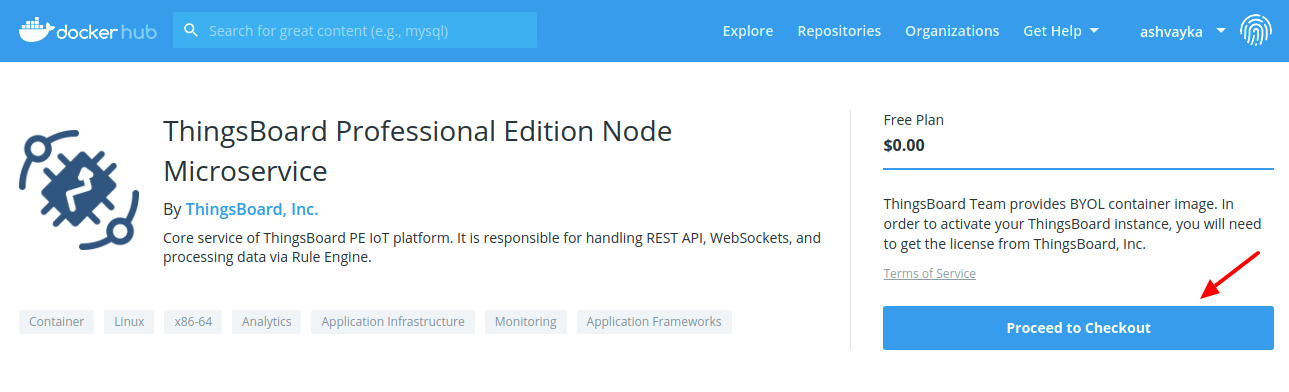
Step 1. Checkout all ThingsBoard PE Images
Please checkout all ThingsBoard PE Images from Docker Hub. You will need to open all verified images and click on “Proceed to checkout” to accept ThingsBoard PE license agreement.
Listing all images mandatory for checkout for your convenience below:
- ThingsBoard PE Node Microservice
- ThingsBoard PE Web UI Microservice
- ThingsBoard PE Web Report Microservice
- ThingsBoard PE JS Executor Microservice
- ThingsBoard PE HTTP Transport Microservice
- ThingsBoard PE MQTT Transport Microservice
- ThingsBoard PE CoAP Transport Microservice
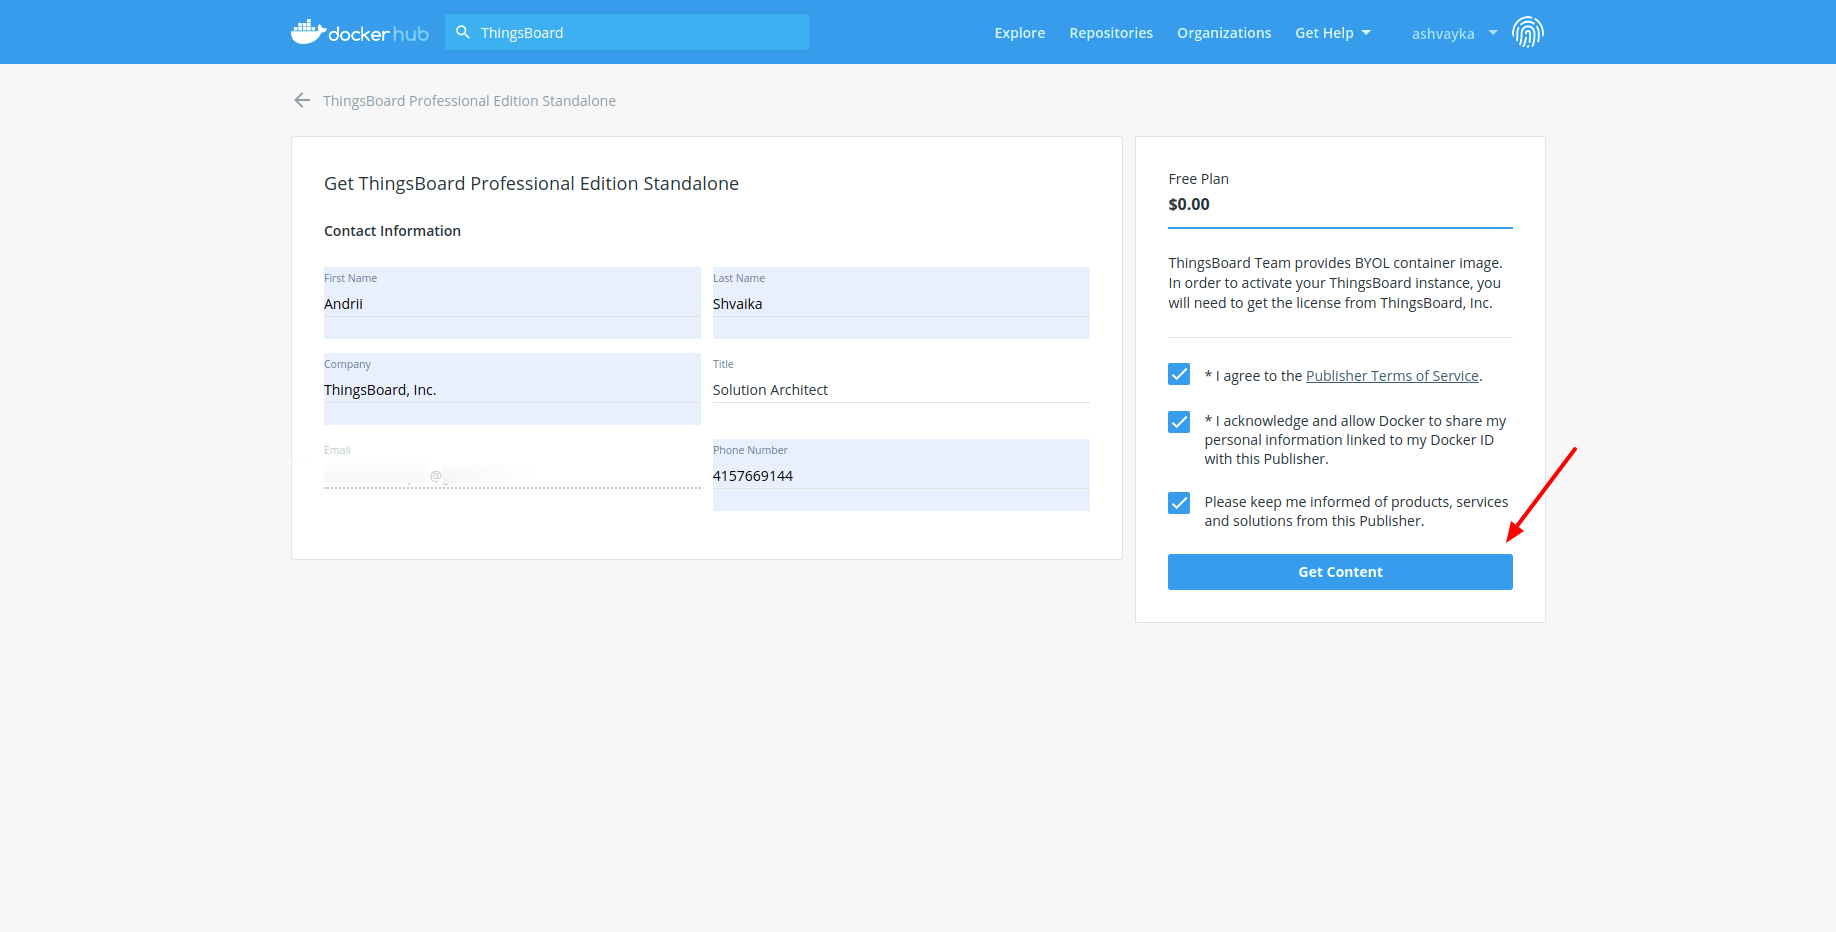
Populate basic information about yourself and click “Get Content”
Step 2. Pull ThingsBoard PE Images
Make sure your have logged in to docker hub using command line.
docker pull store/thingsboard/tb-pe-node:3.0.1PE
docker pull store/thingsboard/tb-pe-web-ui:3.0.1PE
docker pull store/thingsboard/tb-pe-web-report:3.0.1PE
docker pull store/thingsboard/tb-pe-js-executor:3.0.1PE
docker pull store/thingsboard/tb-pe-http-transport:3.0.1PE
docker pull store/thingsboard/tb-pe-mqtt-transport:3.0.1PE
docker pull store/thingsboard/tb-pe-coap-transport:3.0.1PE
Step 3. Clone ThingsBoard PE Docker Compose scripts
git clone https://github.com/thingsboard/thingsboard-pe-docker-compose.git tb-pe-docker-compose
Step 4. Obtain your license key
We assume you have already chosen your subscription plan or decided to purchase a perpetual license. If not, please navigate to pricing page to select the best license option for your case and get your license. See How-to get pay-as-you-go subscription or How-to get perpetual license for more details.
IMPORTANT NOTE: Make sure you have purchased a license key for at least two instances of ThingsBoard PE. Otherwise you need to modify local copy of docker-compose.yml to use only one ThingsBoard instance. We will reference the license key you have obtained during this step as PUT_YOUR_LICENSE_SECRET_HERE later in this guide.
Step 5. Configure your license key
cd tb-pe-docker-compose
nano tb-node.env
and put the license secret parameter
# ThingsBoard server configuration

ZOOKEEPER_ENABLED=true
...

TB_LICENSE_SECRET=PUT_YOUR_LICENSE_SECRET_HERE
Step 6. Review the architecture page
Starting ThingsBoard v2.2, it is possible to install ThingsBoard cluster using new microservices architecture and docker containers. See microservices architecture page for more details.
Step 7. Configure ThingsBoard database
Before performing initial installation you can configure the type of database to be used with ThingsBoard.
In order to set database type change the value of DATABASE variable in .env file to one of the following:
postgres- use PostgreSQL database;hybrid- use PostgreSQL for entities database and Cassandra for timeseries database;
NOTE: According to the database type corresponding docker service will be deployed (see docker-compose.postgres.yml, docker-compose.hybrid.yml for details).
Step 8. Choose ThingsBoard queue service
ThingsBoard is able to use various messaging systems/brokers for storing the messages and communication between ThingsBoard services. How to choose the right queue implementation?
-
In Memory queue implementation is built-in and default. It is useful for development(PoC) environments and is not suitable for production deployments or any sort of cluster deployments.
-
Kafka is recommended for production deployments. This queue is used on the most of ThingsBoard production environments now. It is useful for both on-prem and private cloud deployments. It is also useful if you like to stay independent from your cloud provider. However, some providers also have managed services for Kafka. See AWS MSK for example.
-
RabbitMQ is recommended if you don’t have much load and you already have experience with this messaging system.
-
AWS SQS is a fully managed message queuing service from AWS. Useful if you plan to deploy ThingsBoard on AWS.
-
Google Pub/Sub is a fully managed message queuing service from Google. Useful if you plan to deploy ThingsBoard on Google Cloud.
-
Azure Service Bus is a fully managed message queuing service from Azure. Useful if you plan to deploy ThingsBoard on Azure.
See corresponding architecture page and rule engine page for more details.
|
Apache Kafka is an open-source stream-processing software platform. Configure ThingsBoard environment file: Check following line: |
AWS SQS ConfigurationTo access AWS SQS service, you first need to create an AWS account. To work with AWS SQS service you will need to create your next credentials using this instruction:
Configure ThingsBoard environment file: Check following line:** Configure AWS SQS environment file for ThingsBoard queue service: Don’t forget to replace “YOUR_KEY”, “YOUR_SECRET” with your real AWS SQS IAM user credentials and “YOUR_REGION” with your real AWS SQS account region: |
Google Pub/Sub ConfigurationTo access Pub/Sub service, you first need to create an Google cloud account. To work with Pub/Sub service you will need to create a project using this instruction. Create service account credentials with the role “Editor” or “Admin” using this instruction, and save json file with your service account credentials step 9 here. Configure ThingsBoard environment file: Check following line:** Configure Pub/Sub environment file for ThingsBoard queue service: Don’t forget to replace “YOUR_PROJECT_ID”, “YOUR_SERVICE_ACCOUNT” with your real Pub/Sub project id, and service account (it is whole data from json file): |
Azure Service Bus ConfigurationTo access Azure Service Bus, you first need to create an Azure account. To work with Service Bus service you will need to create a Service Bus Namespace using this instruction. Create Shared Access Signature using this instruction. Configure ThingsBoard environment file: Check following line:** Configure Service Bus environment file for ThingsBoard queue service: Don’t forget to replace “YOUR_NAMESPACE_NAME” with your real Service Bus namespace name, and “YOUR_SAS_KEY_NAME”, “YOUR_SAS_KEY” with your real Service Bus credentials. Note: “YOUR_SAS_KEY_NAME” it is “SAS Policy”, “YOUR_SAS_KEY” it is “SAS Policy Primary Key”: |
|
For installing RabbitMQ use this instruction. Configure ThingsBoard environment file: Check following line:** Configure RabbitMQ environment file for ThingsBoard queue service: Don’t forget to replace “YOUR_USERNAME” and “YOUR_PASSWORD” with your real user credentials, “localhost” and “5672” with your real RabbitMQ host and port: |
Step 9. Running
Execute the following command to create log folders for the services and chown of these folders to the docker container users. To be able to change user, chown command is used, which requires sudo permissions (script will request password for a sudo access):
$ ./docker-create-log-folders.sh
Execute the following command to run installation:
$ ./docker-install-tb.sh --loadDemo
Where:
--loadDemo- optional argument. Whether to load additional demo data.
Execute the following command to start services:
$ ./docker-start-services.sh
After a while when all services will be successfully started you can open http://{your-host-ip} in you browser (for ex. http://localhost).
You should see ThingsBoard login page.
Use the following default credentials:
- System Administrator: sysadmin@thingsboard.org / sysadmin
If you installed DataBase with demo data (using --loadDemo flag) you can also use the following credentials:
- Tenant Administrator: tenant@thingsboard.org / tenant
- Customer User: customer@thingsboard.org / customer
In case of any issues you can examine service logs for errors. For example to see ThingsBoard node logs execute the following command:
$ docker-compose logs -f tb-core1 tb-rule-engine1
Or use docker-compose ps to see the state of all the containers.
Use docker-compose logs --f to inspect the logs of all running services.
See docker-compose logs command reference for details.
Execute the following command to stop services:
$ ./docker-stop-services.sh
Execute the following command to stop and completely remove deployed docker containers:
$ ./docker-remove-services.sh
Execute the following command to update particular or all services (pull newer docker image and rebuild container):
$ ./docker-update-service.sh [SERVICE...]
Where:
[SERVICE...]- list of services to update (defined in docker-compose configurations). If not specified all services will be updated.
Upgrading
In case when database upgrade is needed, execute the following commands:
$ ./docker-stop-services.sh
$ ./docker-upgrade-tb.sh --fromVersion=[FROM_VERSION]
$ ./docker-start-services.sh
Where:
FROM_VERSION- from which version upgrade should be started. See Upgrade Instructions for validfromVersionvalues.
Next steps
-
Getting started guides - These guides provide quick overview of main ThingsBoard features. Designed to be completed in 15-30 minutes.
-
Connect your device - Learn how to connect devices based on your connectivity technology or solution.
-
Data visualization - These guides contain instructions how to configure complex ThingsBoard dashboards.
-
Data processing & actions - Learn how to use ThingsBoard Rule Engine.
-
IoT Data analytics - Learn how to use rule engine to perform basic analytics tasks.
-
Hardware samples - Learn how to connect various hardware platforms to ThingsBoard.
-
Advanced features - Learn about advanced ThingsBoard features.
-
Contribution and Development - Learn about contribution and development in ThingsBoard.