Weather reading using REST API calls
This tutorial will show how to get weather data using REST API.
- Use case
- Prerequisites
- Adding the asset
- Assigning asset to customer in Community edition
- Registering on data-providing website
- Creating attributes
- Message flow
- Setting up dashboard
- Next steps
Use case
Let’s assume your need to know the current weather in the asset location. You may use the weather info for certain data processing logic or just to track history and enable visualization of this info on the dashboard.
In this tutorial we will configure ThingsBoard Rule Engine to automatically get weather information using REST API. You can use this tutorial as a basis for more complex tasks.
Prerequisites
We assume you have completed the following guides and reviewed the articles listed below:
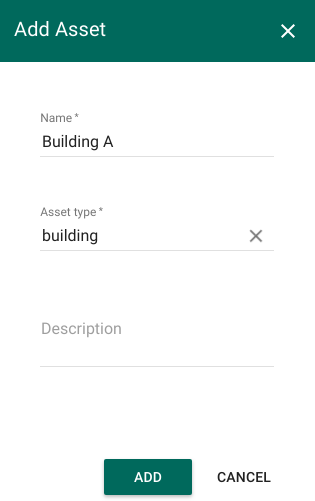
Adding the asset
Add Asset entity in ThingsBoard. Its name is Building A and its type is building.
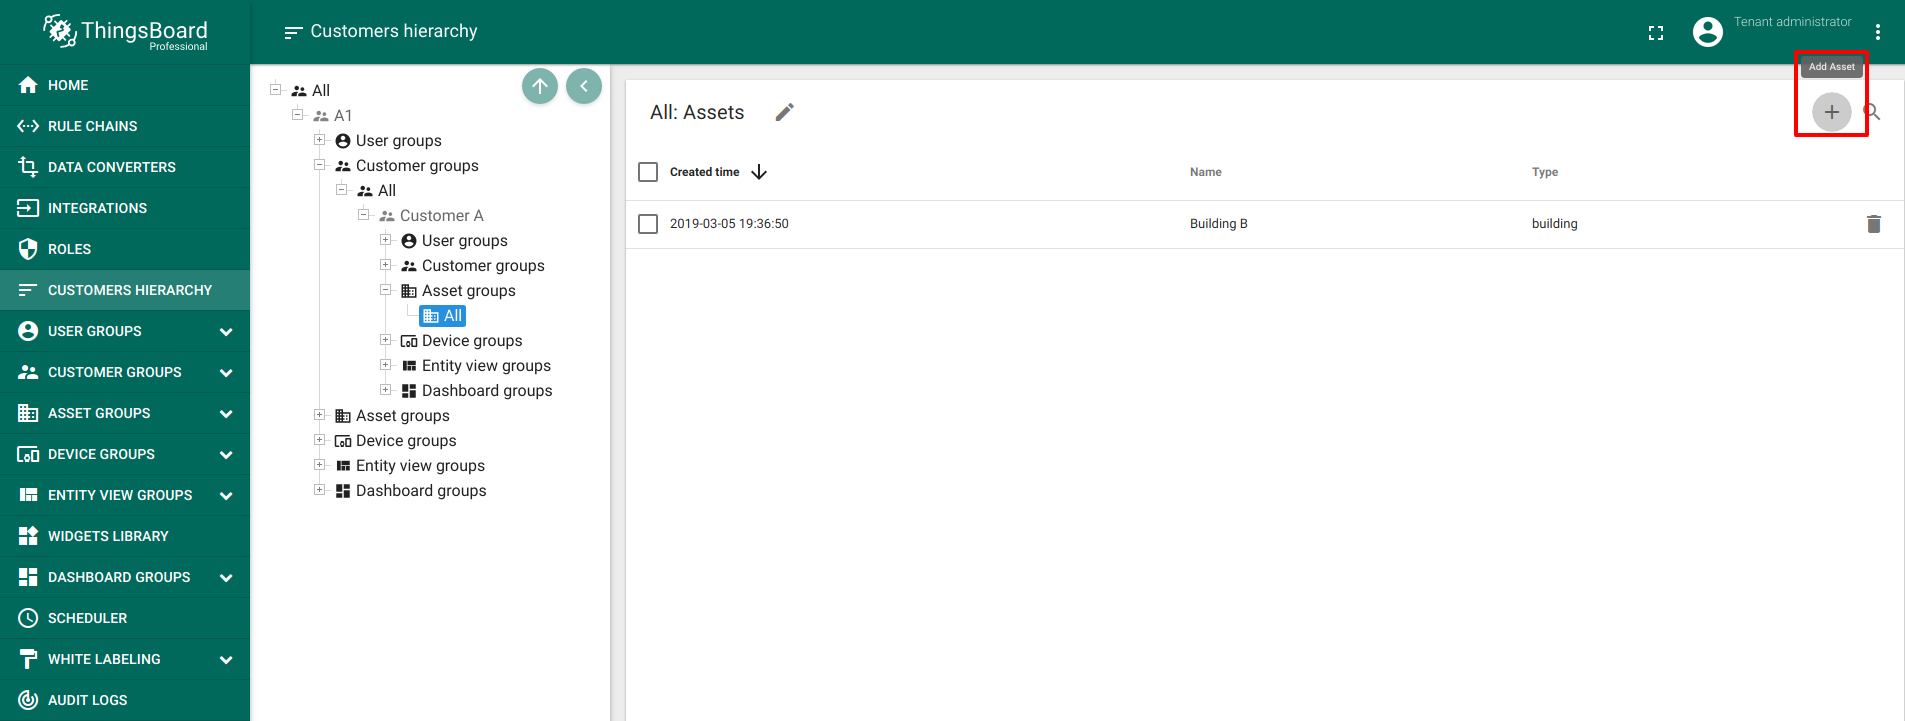
Note:If you have Professional Edition, you will need to add asset to customer using Customer Hierarchy the following way:
- Go to Customers Hierarchy -> All -> (Current tenant) -> Customer groups -> (Your customer group) -> (Your customer) -> Asset groups -> (Your asset group) -> Add asset
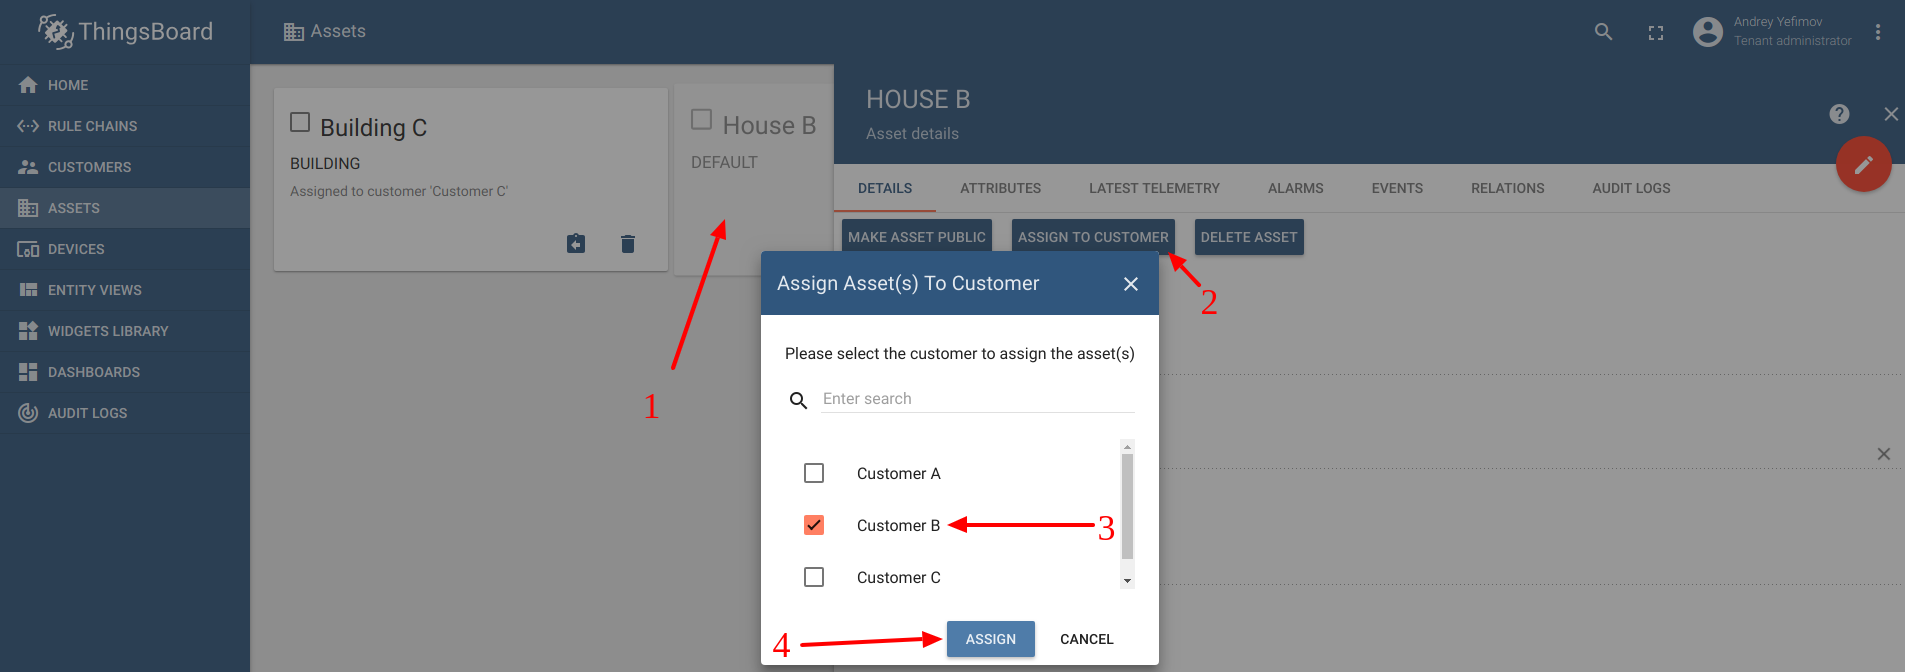
Assigning asset to customer in Community edition
- Go to Assets -> Assign to customer -> (Your Customer) -> Assign
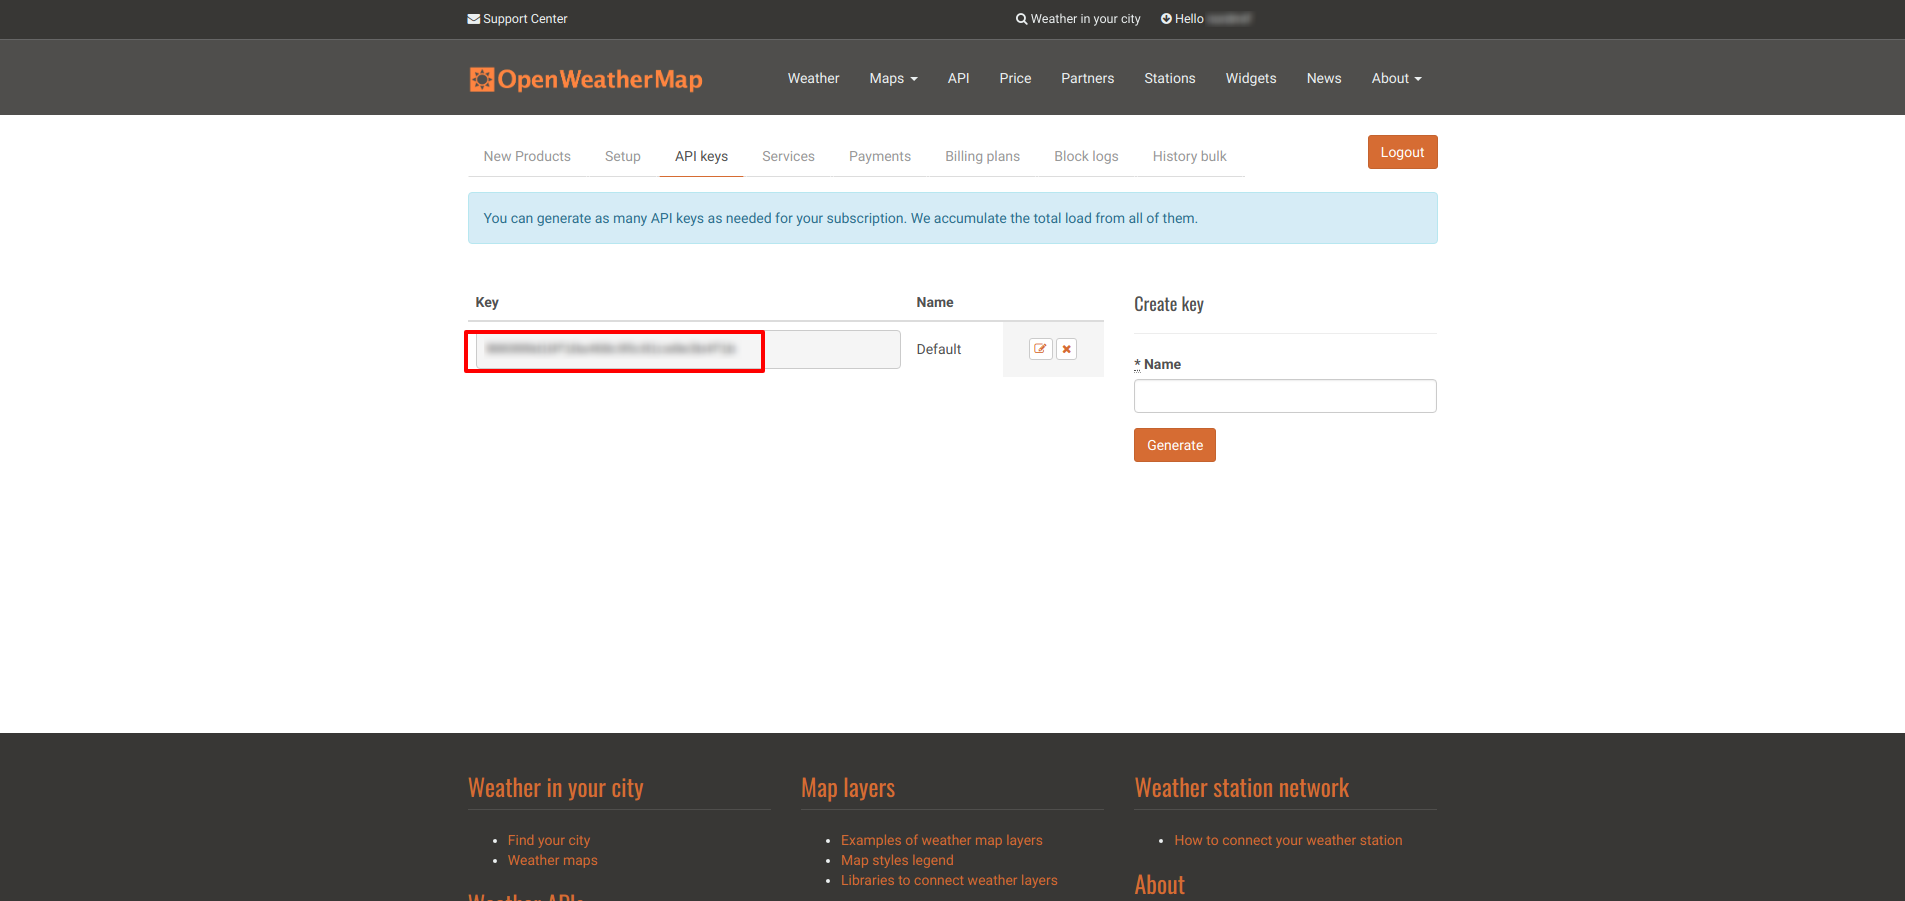
Registering on data-providing website
In order to get weather data you should register on a website which will provide it. In this case OpenWeatherMap will be used.
After signing up there go to this page to get your api key.
Creating attributes
To perform REST API call we need the following URL parameters: API key, longitude, latitude, and units of measurement.
We suggest adding an API key parameter to the customer server-side attribute and other parameters to the asset server-side attributes.
Customer attribute should look like this:
- Go to (Assigned customer) -> Attributes -> Add
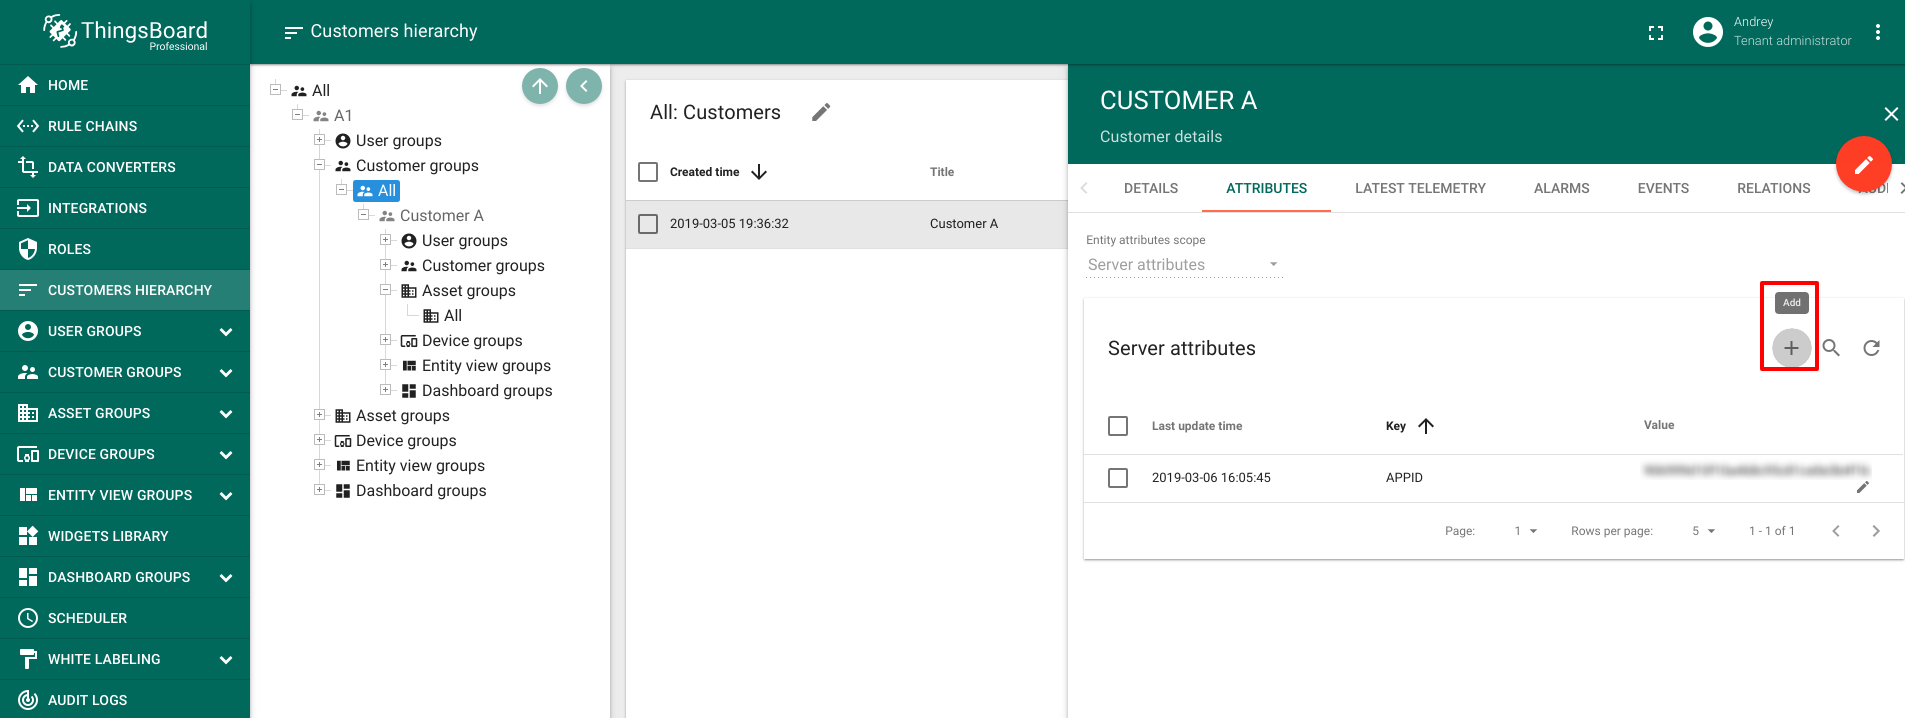
Add the attribute as following:
| Field | Data Type | Input Data |
| APPID | String | (an API key you got from OpenWeatherMap) |
Asset attributes should look like this:
- Go to Building A -> Attributes -> Add
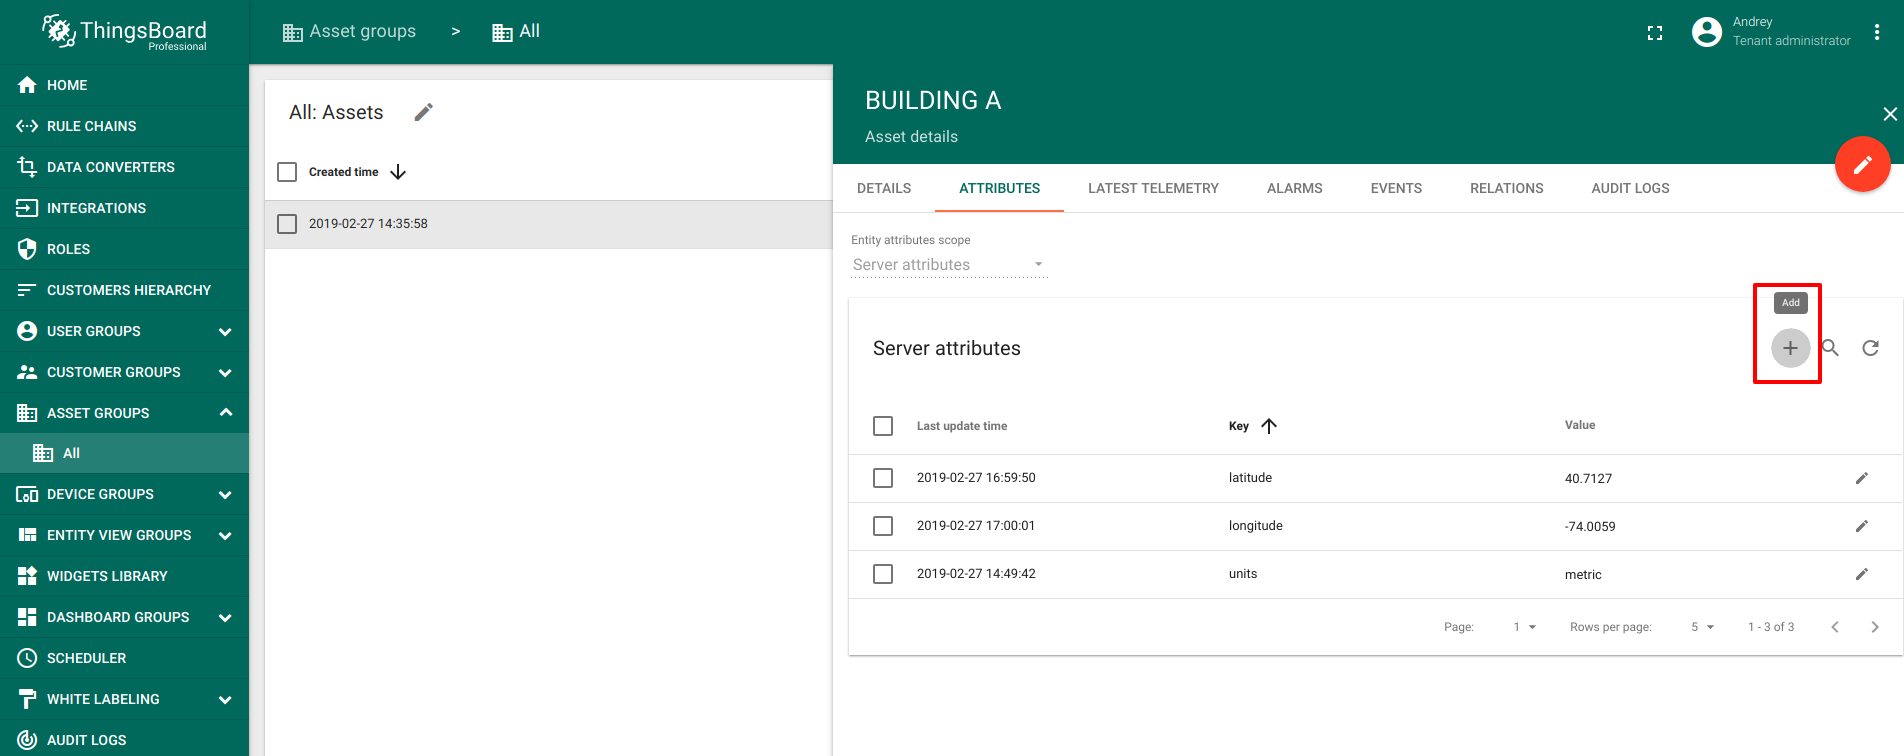
- Fill in the attributes with the input data shown in the following table:
| Field | Data Type | Input Data |
| latitude | Double | latitude of an asset |
| longitude | Double | longitude of an asset |
| units | String | "metric" for meters per second wind speed and Celsius temperature, "imperial" for miles per hour wind speed and Fahrenheit temperature, empty for meters per second wind speed and Kelvin temperature |
In this example the coordinates of New York City and metric units will be used.
Message flow
In this section, we explain the purpose of each node in this tutorial. There will be one rule chain involved:
- Outside Temperature/Humidity - rule chain sends API calls to OpenWeatherMap every 15 seconds and sends data about humidity and temperature to a chosen asset.
The following screenshot show how the above Rule Chain should look like:
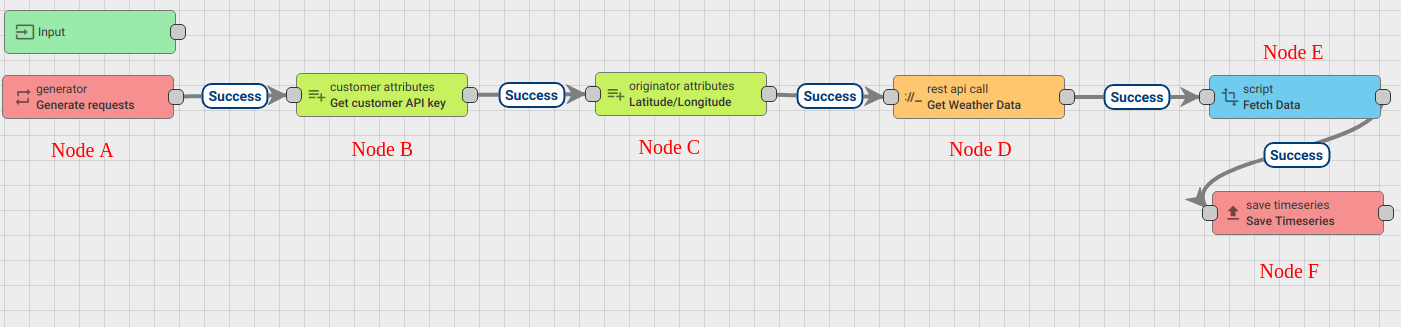
Download and import attached json file with a rule chain for this tutorial. Be aware that you need to set the asset you created in the beginning as an originator in the leftmost generator node.
The following section shows you how to create this rule chain from scratch.
Create new Rule Chain (Outside Temperature/Humidity)
Go to Rule Chains -> Add new Rule Chain
Configuration:
- Name : Outside Temperature/Humidity
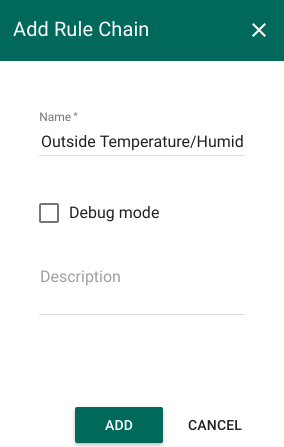
New Rule Chain is created. Press Edit button and configure Chain.
Adding the required nodes
In this rule chain, you will create 5 nodes as it will be explained in the following sections:
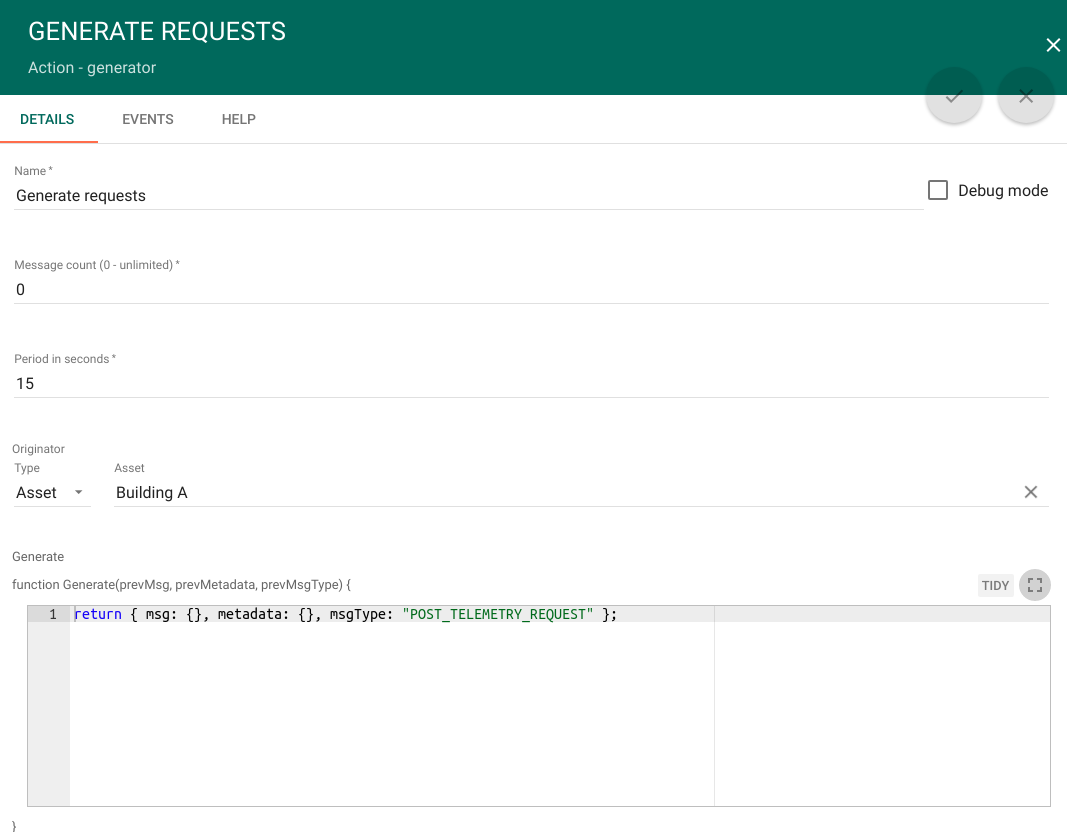
Node A: Generator node
- Add the Generator node. This rule node Generates empty messages to trigger REST API calls.
- Fill its fields the following way:
| Field | Value |
| Name | Generate requests |
| Message count | 0 |
| Period in seconds | 15 |
| Originator type | Asset |
| Asset | Building A |
| Generate function | return { msg: {}, metadata: {}, msgType: "POST_TELEMETRY_REQUEST" }; |
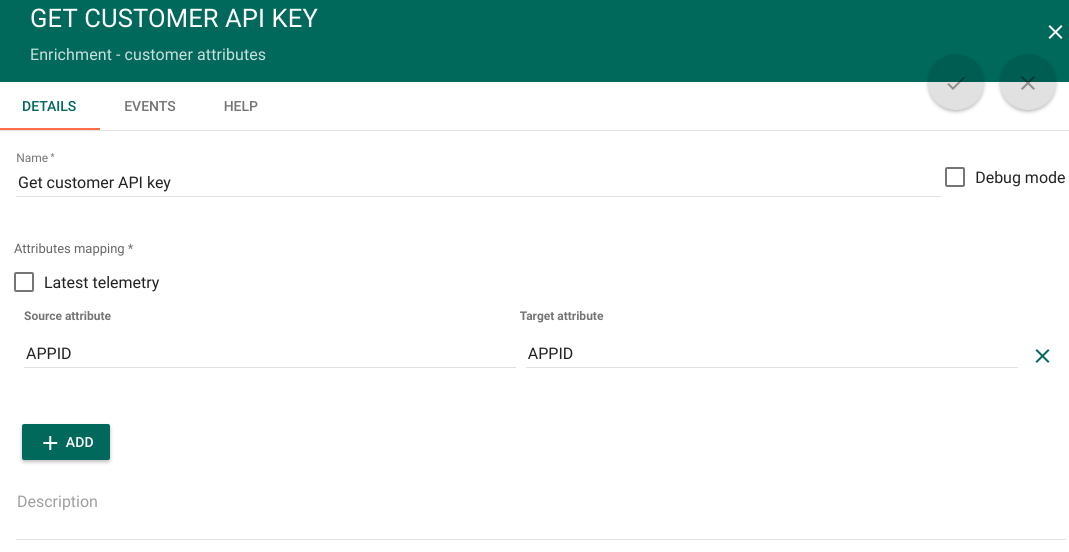
Node B: Customer attributes enrichment node
- Add the Customer attributes node and connect it to a Generator node with a relation type Success. This node will put customer attribute APPID into the metadata of message.
- Fill its fields the following way:
| Field | Value |
| Name | Get customer API key |
| Latest telemetry | False |
| Source attribute | APPID |
| Target attribute | APPID |
Node C: Originator attributes enrichment node
- Add the Originator attributes enrichment node and connect it to Customer attributes node node with a relation type Success. This node will fetch server attributes latitude, longitude and units of the originator set up in a Generator node into metadata
- Fill its fields the following way:
Field Value Name Latitude/Longitude Server attributes latitude, longitude, units 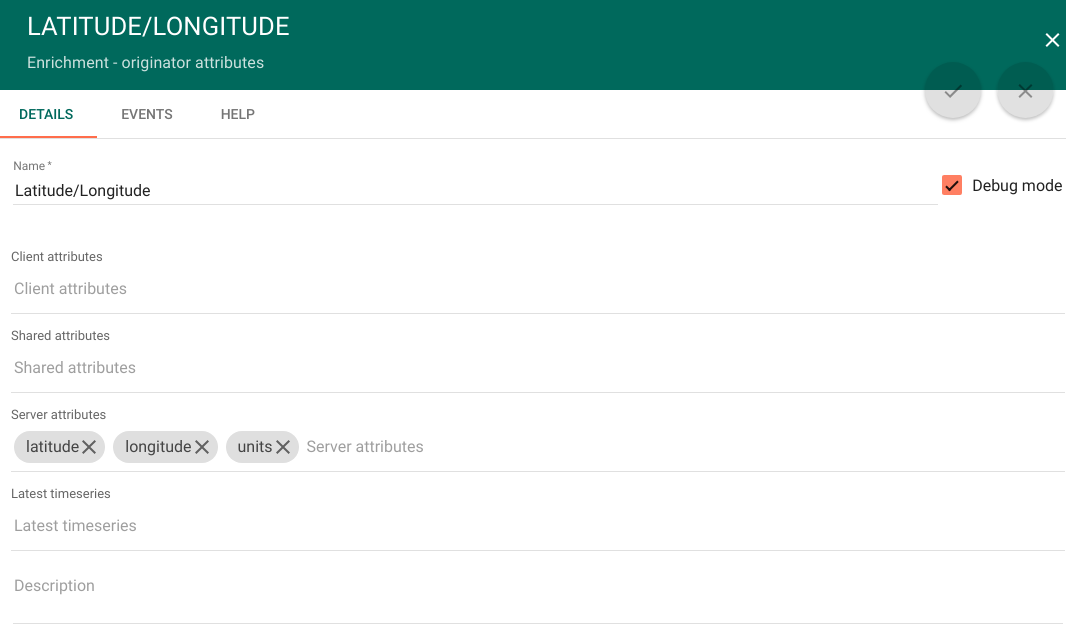
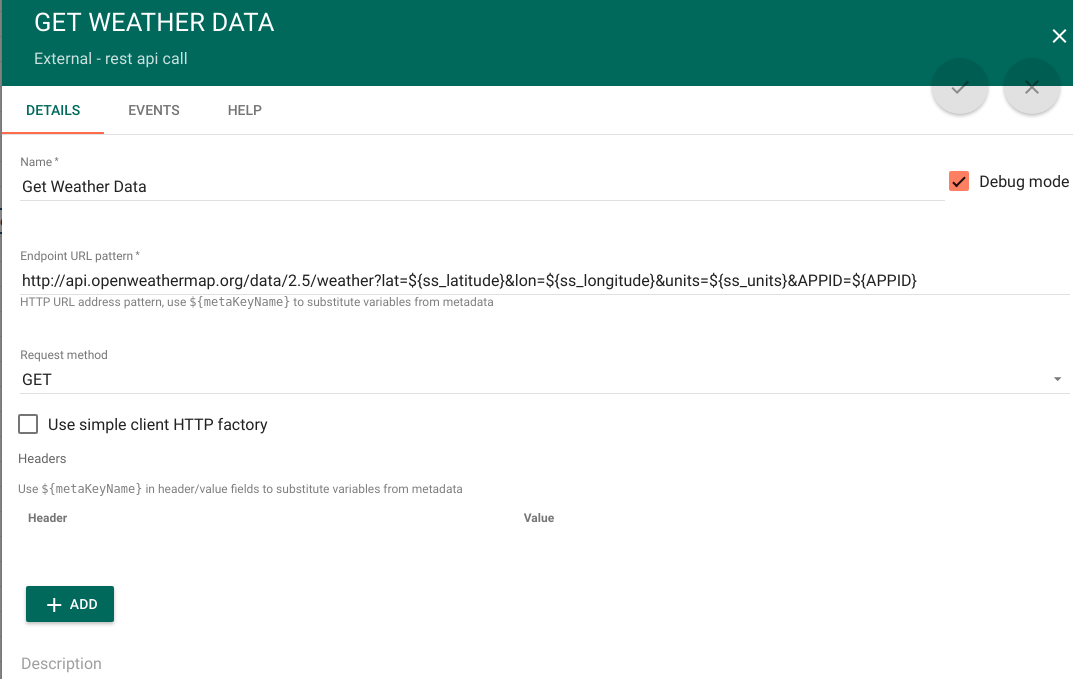
Node D: External REST API call node
- Add the External REST API call node and connect it to Originator attributes enrichment node with a relation type Success. This node will perform REST API calls to OpenWeatherMap.
- Fill its fields the following way:
Field Value Name Get Weather Data Endpoint URL pattern http://api.openweathermap.org/data/2.5/weather?lat=${ss_latitude}&lon=${ss_longitude}&units=${ss_units}&APPID=${APPID} Request method GET Use simple client HTTP factory False - ss_latitude, ss_longitude, ss_units, ss_APPID are server attributes fetched from metadata which were put there by Originator attributes enrichment node
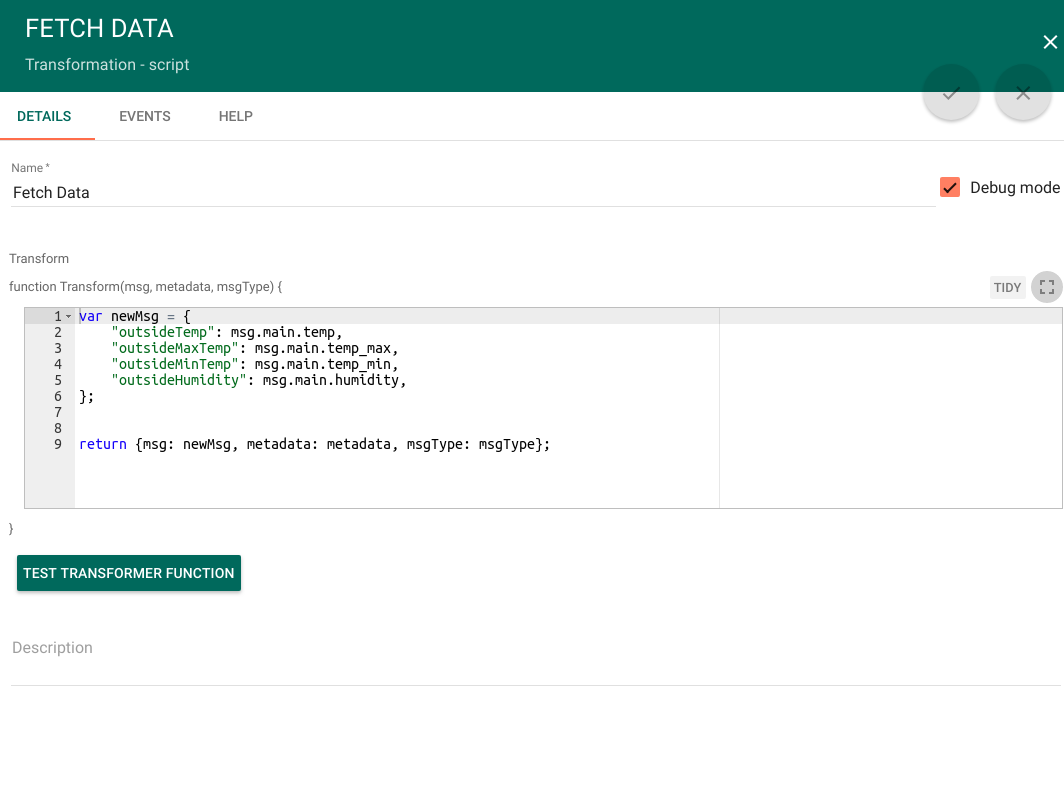
Node E: Script transformation node
- Add the Script transformation node and connect it to External REST API call node with a relation type Success. This node will put outside temperature, maximal temperature, minimal temperature and humidity into the message.
- Fill Transform function the following way:
      var newMsg = {
          "outsideTemp": msg.main.temp,
          "outsideMaxTemp": msg.main.temp_max,
          "outsideMinTemp": msg.main.temp_min,
          "outsideHumidity": msg.main.humidity,
      };


      return {msg: newMsg, metadata: metadata, msgType: msgType};
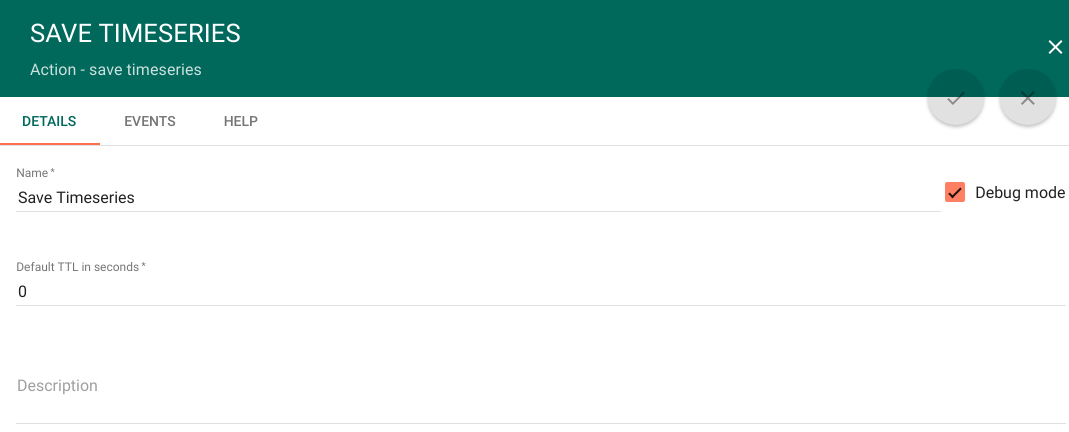
Node F: Save timeseries node
- Add the Script transformation node and connect it to External REST API call node with a relation type Success. This node will put message into telemetry.
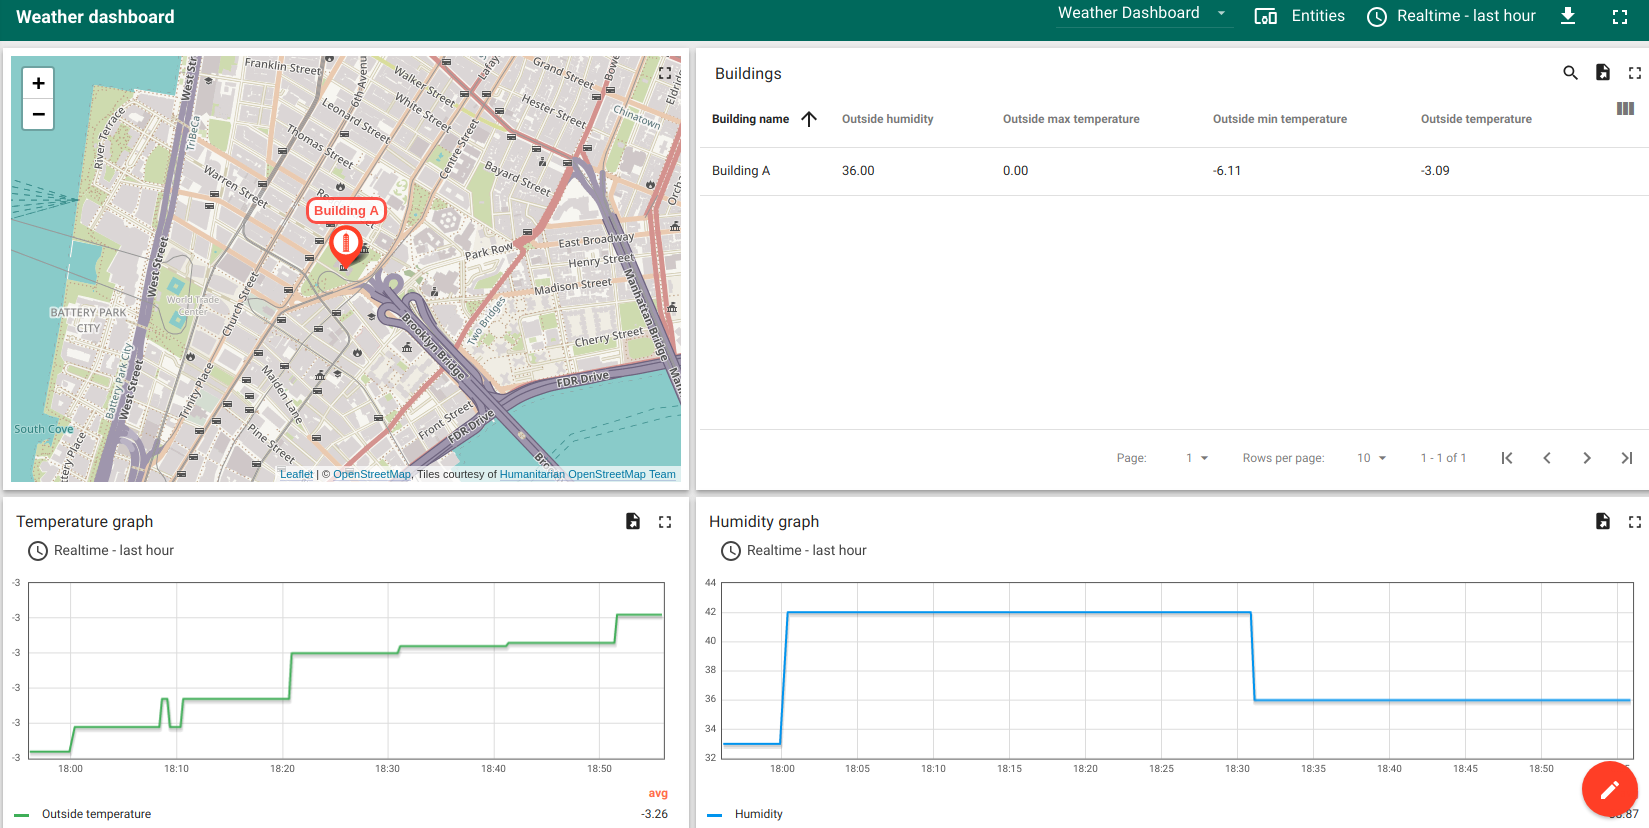
Setting up dashboard
Download and import attached json file with a dashboard for this tutorial.
The dashboard should look like this:
Next steps
-
Getting started guides - These guides provide quick overview of main ThingsBoard features. Designed to be completed in 15-30 minutes.
-
Installation guides - Learn how to setup ThingsBoard on various available operating systems.
-
Connect your device - Learn how to connect devices based on your connectivity technology or solution.
-
Data visualization - These guides contain instructions how to configure complex ThingsBoard dashboards.
-
IoT Data analytics - Learn how to use rule engine to perform basic analytics tasks.
-
Hardware samples - Learn how to connect various hardware platforms to ThingsBoard.
-
Advanced features - Learn about advanced ThingsBoard features.
-
Contribution and Development - Learn about contribution and development in ThingsBoard.